This post may contain affiliate links. Please read our disclosure policy.
Looking for a simple holiday dessert that’s EASY to make and great for a crowd (or just lots of leftovers!). Then look no further than this EASY Sheet Pan Pumpkin Pie! The filling comes together quickly in a blender and the whole thing can be made in no time.
Thank you to Chicago Metallic for sponsoring this post. They’re a long time sponsor of Food with Feeling and half of what I own in my kitchen is made by them because I love it all so much! Thank you for supporting the brands that make my blog possible.

This pie is my LAST NEW recipe of Thanksgiving Week (although, there are a few more delicious holiday recipes coming before Thanksgiving!). I’ve been wanting to test out this recipe for years now and I’m so glad that I finally managed to get it done.
While I love a good ole classic pumpkin pie, this sheet pan pie just changes the whole game.
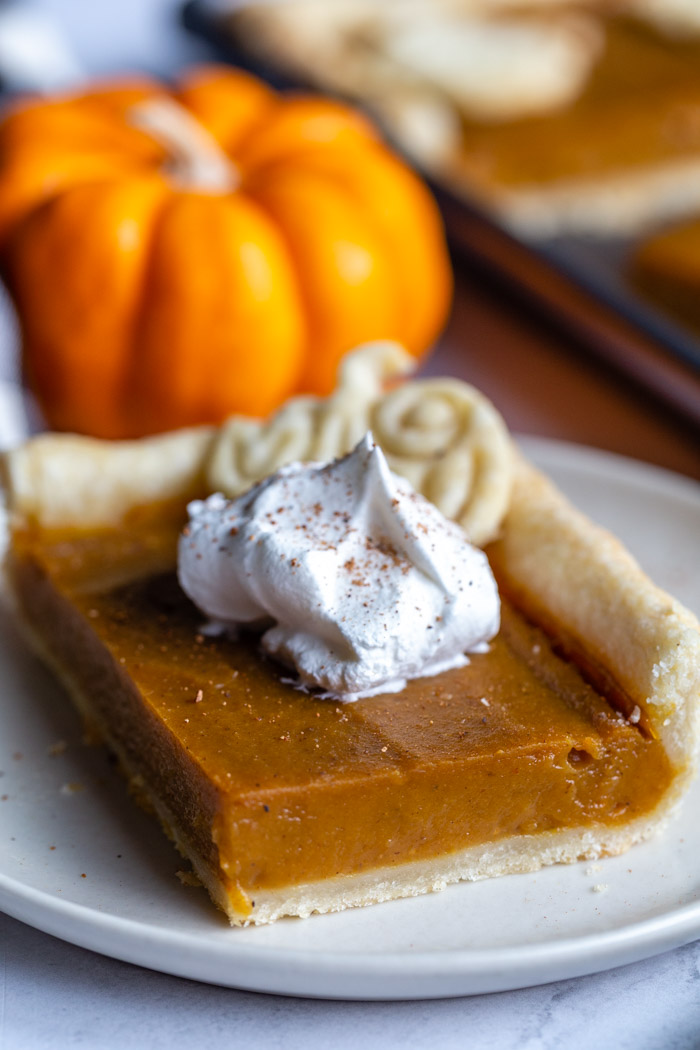
FIRST of all, it’s just so easy. No messing with crimping a crust or trying to get it to look perfect. The filling also comes together in a blender. Like, throw ALL of the ingredients in and blend until smooth. SO SO simple and I love it for that.
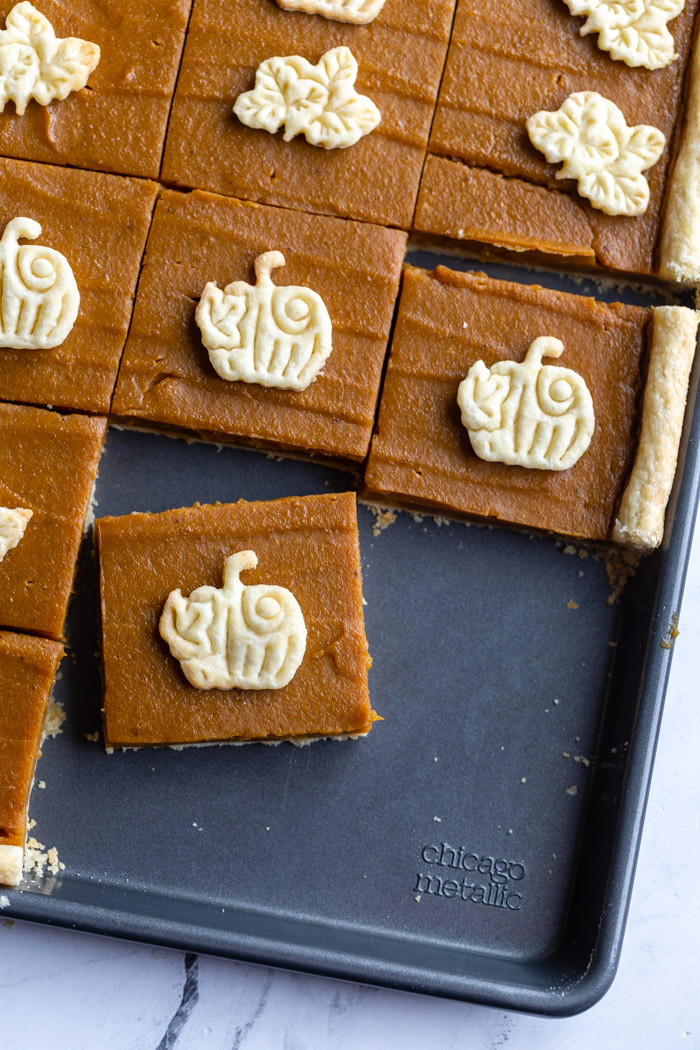
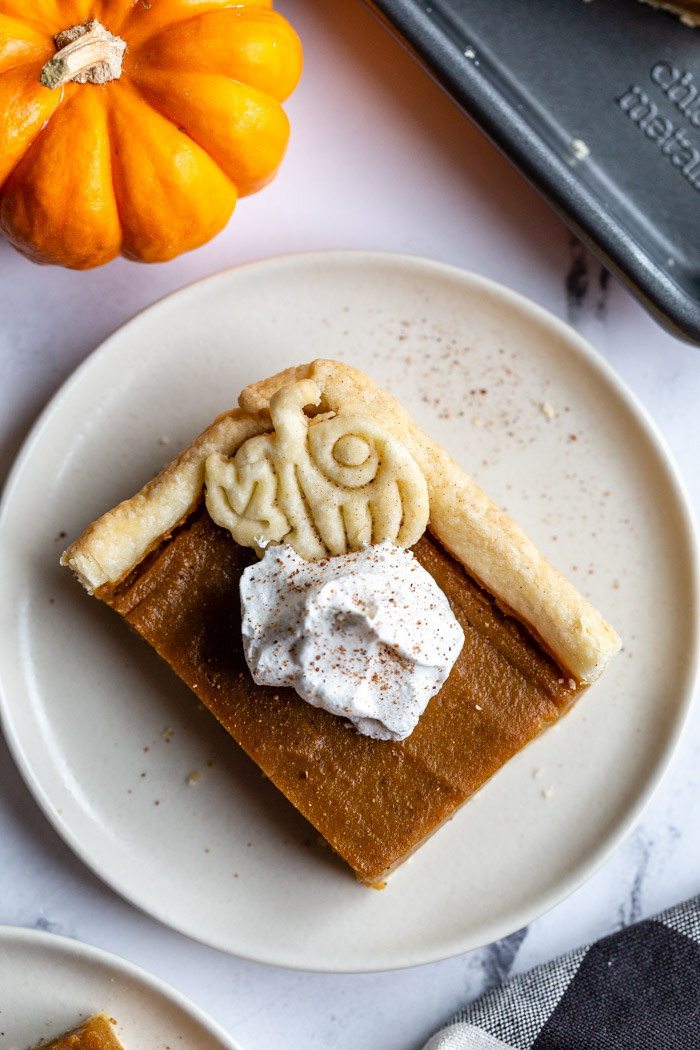
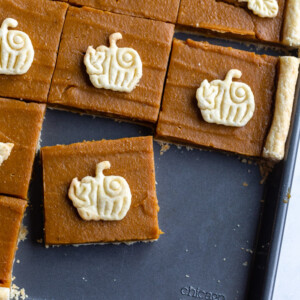
The other thing that makes this pie so great is that it is perfect for smaller portions to feed a crowd (or just a few people with lots of amazing leftovers). We always have multiple desserts served at Thanksgiving and I can never pick just one. HOWEVER, I’m also always full and rarely have much room left for dessert. SO, this pie is great because it’s so much easier to cut into smaller portions for perfectly snackable portions.
But before we dive into this post, I want to tell you a little bit more about Chicago Metallic.
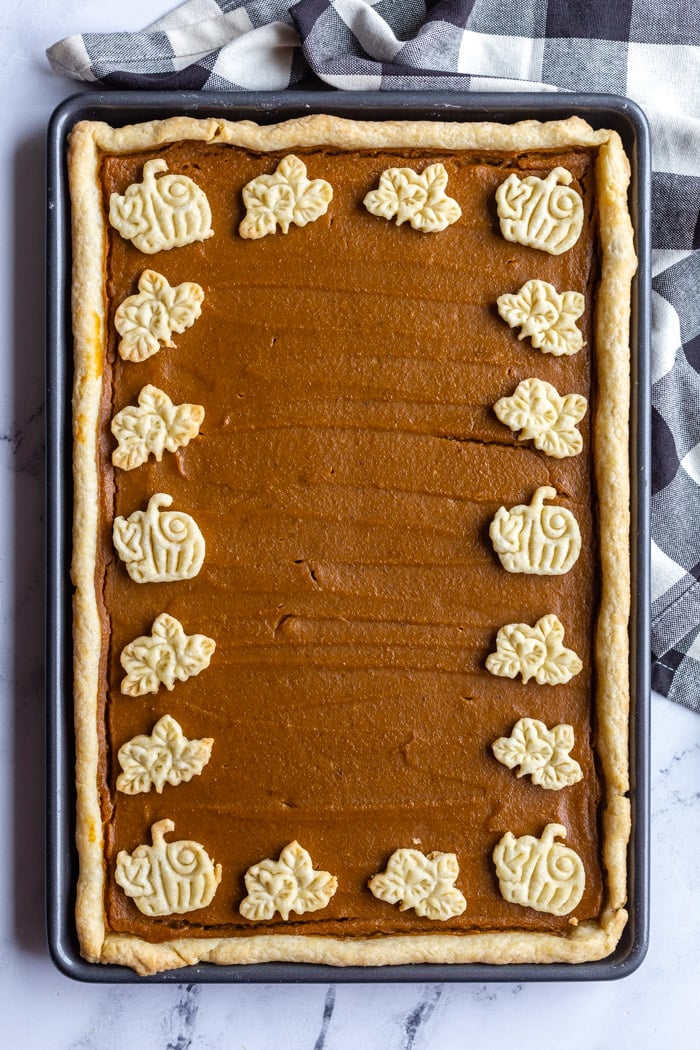
For this pie, I used their classic 12 x 17 inch sheet pan for this pie as well as their adorable pie crust cutters to cut out the pumpkin and leaf shapes.
I cannot tell you how much we love their baking sheets. They’re just so thick and durable and do not stain easily at all. PLUS they won’t break that bank and for that, I absolutely love them. I highly recommend picking up one of these pans to just have around, especially if you’re in the market for new baking dishes.
What’s in this VEGAN sheet pan pie:
- Pie Crust– I modified my original vegan pie crust recipe to make it work perfectly with this particular size sheet pan. It’s simple to make and so so good with this pie.
- Pumpkin puree– since this is a larger than usual pie, we’re using TWO whole cans of pumpkin.
- Cornstarch– in lieu of eggs in this recipe, we’re using the cornstarch to thicken things up and really help with pie set.
- Brown sugar + maple syrup– for the perfect sweetness level
- Seasonings– because what is a pumpkin pie without a hefty dose of pumpkin pie spice?
- Milk of choice– I’ve tried my pumpkin pie recipe with pretty much every dairy-free milk out there and they all worked great!
ALRIGHT that’s it for today! As always, if you end up making this recipe, please snap a quick photo and tag me on Instagram @foodwithfeeling! I always LOVE to see what you’re making from the blog.
Sheet Pan Pumpkin Pie
Ingredients
For the crust:
- 4 cups flour
- 1 cup vegan butter
- 1 ½ tsp sugar + salt
- 7-9 tbs ice water
For the filling:
- 2 15- oz cans of pumpkin puree
- ⅔ cup of brown sugar
- ⅓ cup of maple syrup or agave
- 1 ¼ cup of milk, I tested this with plain almond milk AND coconut milk
- 1 ½ teaspoon of vanilla
- 2 teaspoons of pumpkin pie spice
- ½ teaspoon of salt
- ¼ cup of cornstarch
Instructions
- Lightly grease a 12 x 17 inch baking sheet and set aside.
- In the bowl of a food processor*, combine the flour, salt, and sugar. Pulse a few times to combine.
- Add in the cold butter cubes and pulse a few more times so that the butter is roughly the size of peas.
- Add in the cold water, starting with just 4 tablespoons, and pulse 2 times. Add in 3 more and pulse a couple more times. Test out the dough by pressing some together between your fingers. If it holds together then it’s ready. If it’s still really crumbly then add in more water, 1 tablespoon at a time. Mine is always perfect with 7 total tablespoons but you may need a little more less. SEE VIDEO ABOVE FOR REFERENCE ON DONENESS.
- On a lightly floured surface, pour out the dough and work it so that’s it’s mostly pressed together. Tear off roughly 20% of the dough to be used separately and form form ball (large and small), into discs. Wrap the discs individually in plastic wrap and CHILL for 20 minutes or even overnight.
- When ready to use the dough, let it sit on the counter for a couple minutes to warm up a bit. Roll the dough out so that it will fit in your prepared pan with about 1/2 an inch hanging over the edges. Place it in your pan and place in the fridge while you make the filling.
- Pre-heat your oven to 350 degrees F.
- In a high speed blender or food processor, combine all of the pie ingredients and blend until creamy and smooth.
- Pour the pie filling into your crust (I do NOT pre-bake the crust in this recipe) and spread out until it’s smooth.
- Bake in the oven for45-50 minutes. The top should be firm and the crust should be lightly browned around the edges.
- Once done, take out of the oven and let cool on the counter. Put in the fridge and let cool completely. The cooling process really firms up the pie so although you’ll want to eat it right away, try and refrain :)
- Roll out the remaining 20 of dough to use as decoration. Cut out shapes as desired and bake for 7-10 minutes until lightly browned. Place on top of pie as desired. Serve and ENJOY!


