This post may contain affiliate links. Please read our disclosure policy.
This simple Apple Tart is easy and fun to make and perfect for fall baking! It keeps well and makes for a delicious treat and dessert!
I’ve had this Apple Tart recipe in my back pocket for YEARS! I test it out every year and then never get around to photographing it until apple season is long gone. SO, I was determined not to miss it this year!
Admittedly, I haven’t actually gone apple picking yet but we weren’t going to let another year pass before getting this one up on the blog. So, I guess I’ll just have to make it a few more times this season once I do finally make it to an apple orchard.
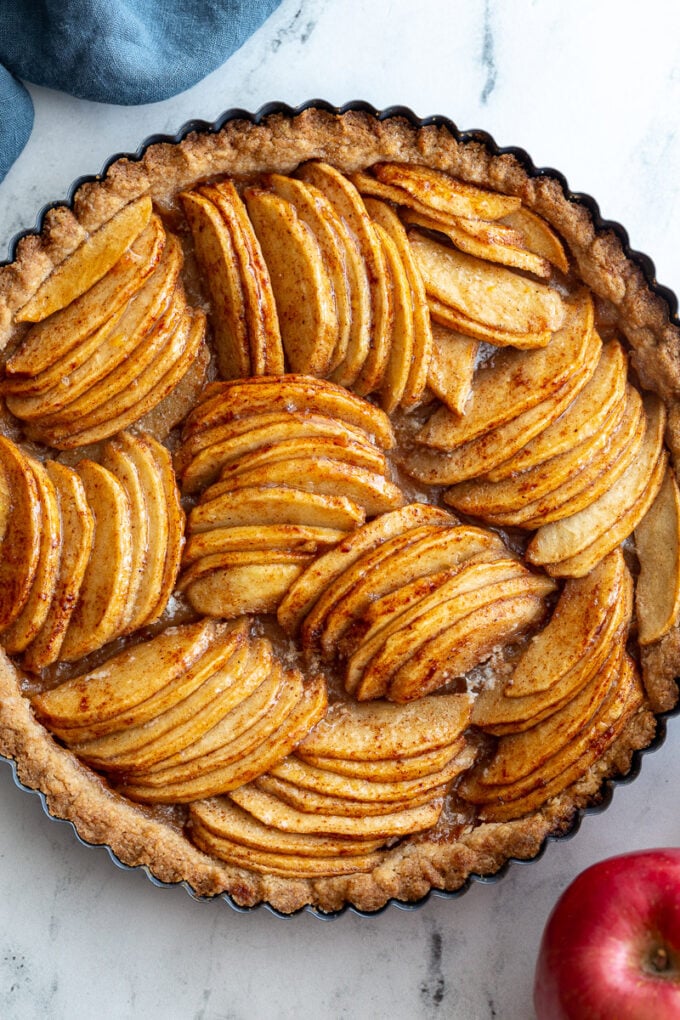
I had originally planned to make a really pretty design with the apples like I’ve seen on some other apple tarts. HOWEVER, that felt like it was going to be SO much work and I really wanted this tart to feel simple and approachable. So, we’ve found a good middle ground that’s EASY but still really pretty and a definite show stopper.
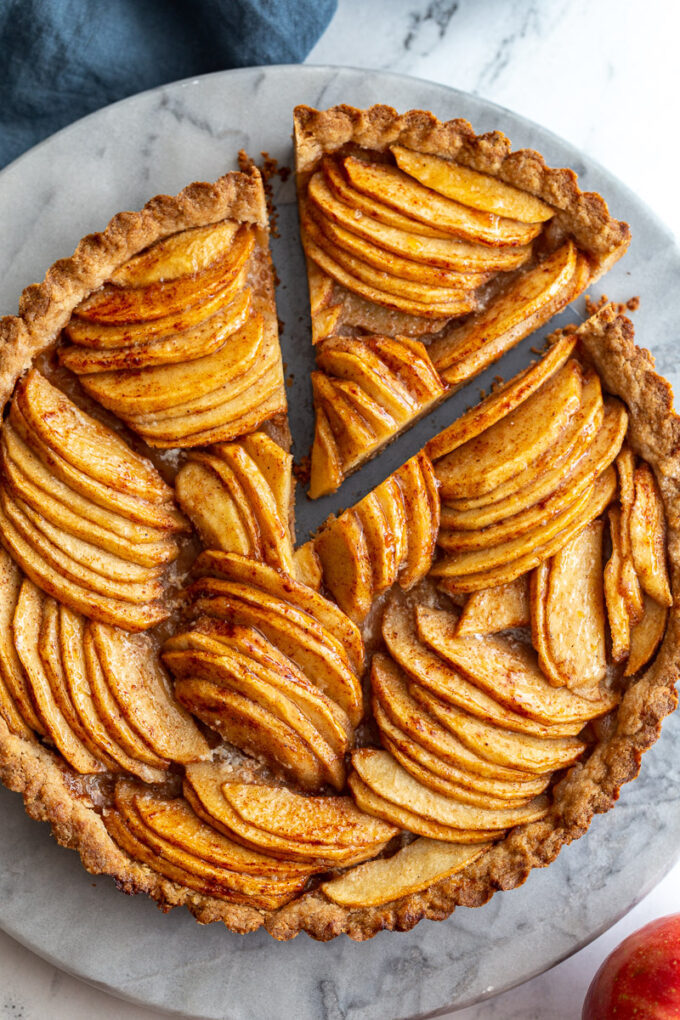
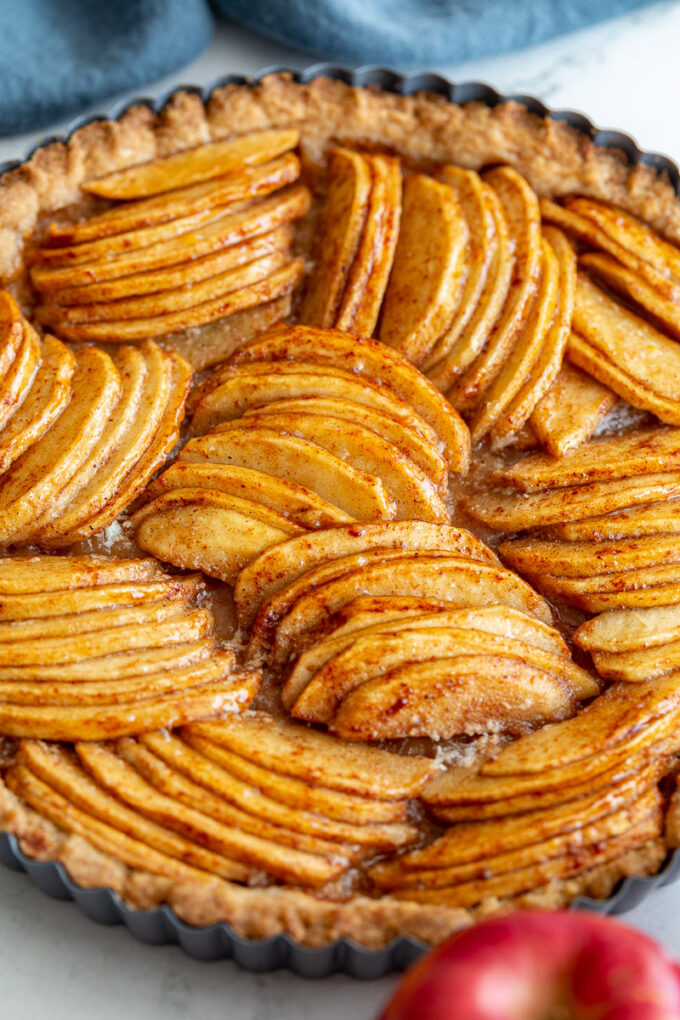
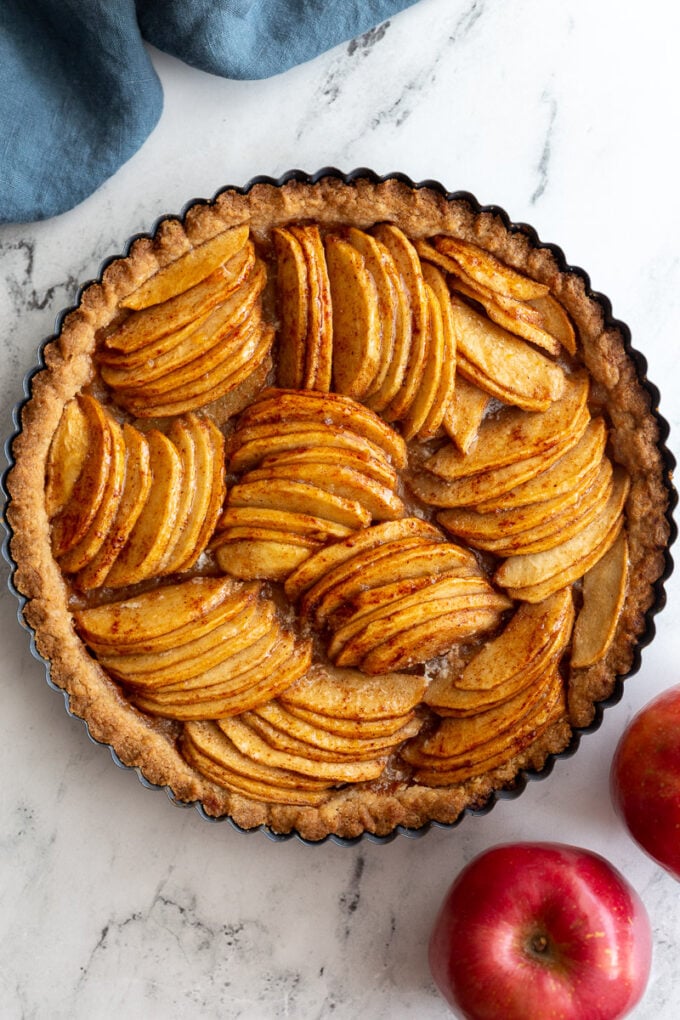
Instead of an intricate design with the apples, we’re simply slicing them and then gently fanning them out before placing whole sections on the tart at once. It took me no more than 2 minutes to arrange the apple slices (compared with a solid 20+ minutes that it took me to make apple roses on a tart last year!).
Ingredients in this Apple Tart:
- Apples (obviously!). You can use whatever type you’d like for this recipe. Tart apples (such as granny smith) are often used in baking but I used gala apples for this.
- Brown sugar for sweetness
- Cinnamon and vanilla for flavor
- Crust- I made a pretty basic crust for this so that the apples could really shine!
How to make this tart:
One of the things that I love about this tart is that it’s super simple to make!
First you’ll make the crust by combining all of the ingredients and pressing them into the tart pan.
Next you’re mix the apples with brown sugar, lemon juice, and some spices before adding them into the tart pan. You could make an intricate design, do something simple like what I did (see photos) OR just dump them in and spend a few moments making sure that they’re all in there.
Anyway works!
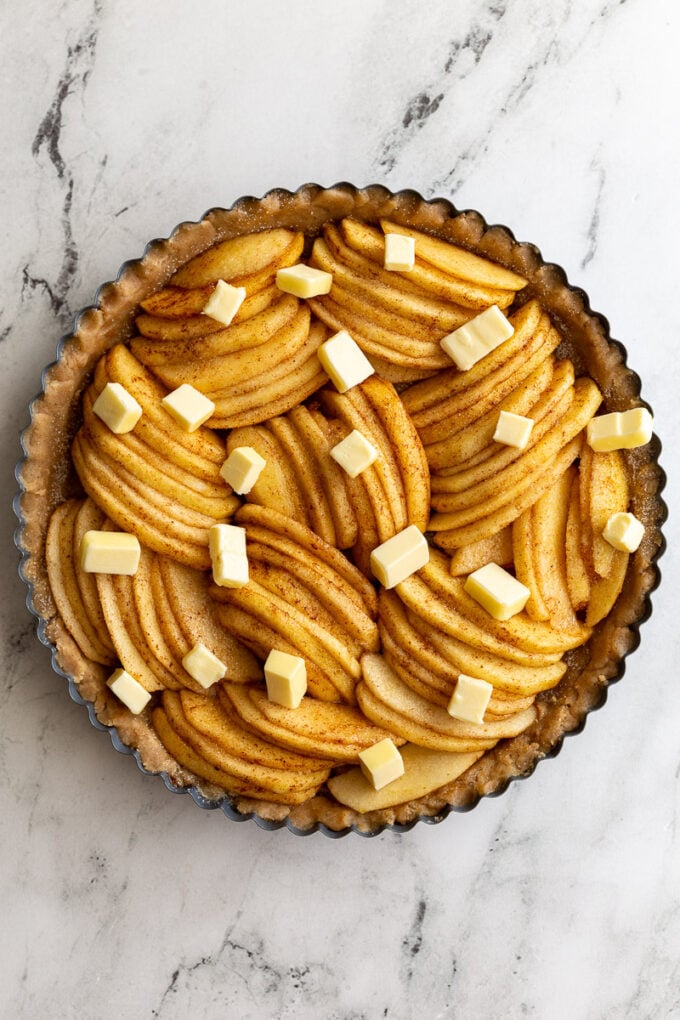
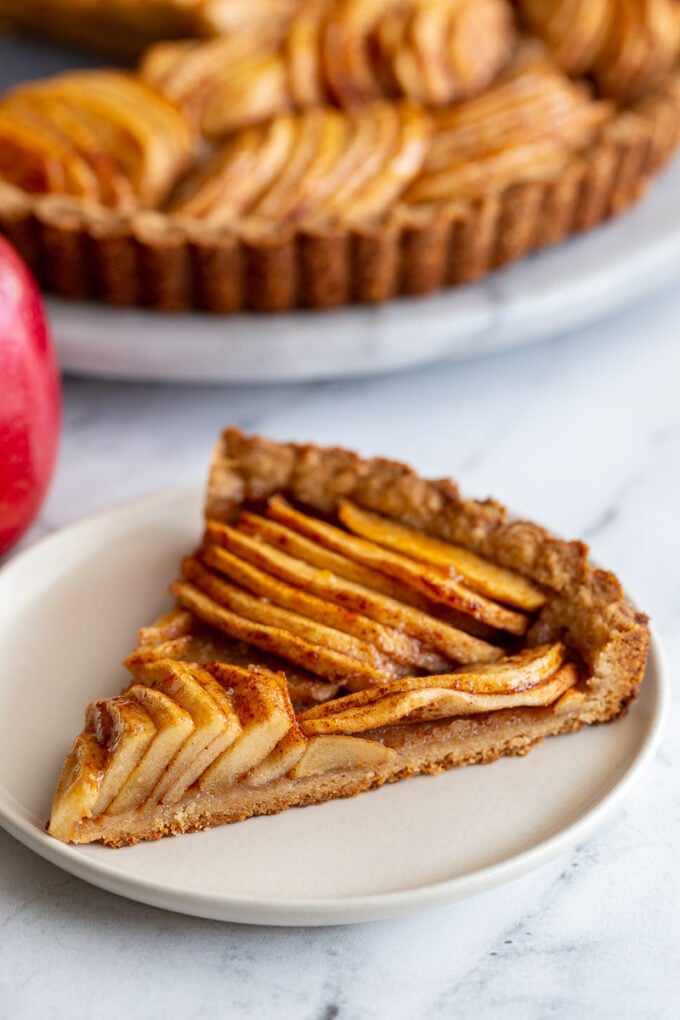
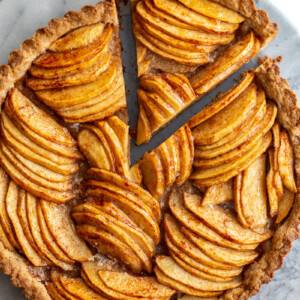
Finally, you’ll dot the top of the tart with cold butter before baking it for about an hour! Super simple but absolutely delicious!
As usual, if you end up making this recipe, please snap a photo and tag me on Instagram @foodwithfeeling! I always love to see what y’all are making from my blog.
Easy Apple Tart
Ingredients
For the crust:
- 1 ⅓ cup of all-purpose flour
- ¼ cup packed brown sugar
- ½ teaspoon of salt
- ½ teaspoon of ground cinnamon
- 10 tablespoons of unsalted butter, melted
For the filling:
- 4 apples, peeled and sliced*
- ⅓ cup of light brown sugar, packed
- Juice of 1/2 a lemon
- ½ tablespoon of ground cinnamon
- ½ tablespoon of pure vanilla extract
- ½ tablespoons of sugar
- 2 tablespoons of unsalted butter, cut into small cubes
Instructions
- Pre-heat the oven to 350 degrees F and grease a 10 inch tart pan (ideally one that has a removable bottom).
- Start by prepping the apples: In a large bowl, toss together the apples, 1/3 cup of brown sugar, lemon juice, and 1/2 tablespoon of cinnamon + vanilla. Mix until the apples are coated and set aside.
- Make the crust: In a large bowl, whisk together the flour, brown sugar, sat, and cinnamon and then use a rubber spatula to fold in the melted butter until fully combined.
- Press the crust into the pan with your fingers so that it goes up the sides evenly and is tightly packed into the pan.
- Arrange the apples in clusters that are lightly fanned out and place them neatly into the crust. I like the alternate the direction that the apples are going to make it visually pleasing. You can also arrange the apples in the tart one at a time so that they make a circular patter starting from the center and going outwards.
- Sprinkle the tart with 1/2 tablespoon of sugar and place the small cubes of butter all around the tart (see photo for reference).
- Bake for 50-60 minutes or until the crust is a deep golden brown and the apples are tender. Optioanal: brush with a little additional butter to keep the apples moist and ENJOY!